
If you’re looking for a quick and easy way to make homemade brownies, look no further than your favorite cake mix! With just a few simple adjustments, you can transform a regular cake mix into rich and fudgy brownies that are sure to satisfy your chocolate cravings. Follow these easy steps to get started on making your own homemade cake mix brownie recipe.
Key Takeaways
- Transform a regular cake mix into delicious brownies with these simple steps.
- Gather all necessary ingredients, including a box of cake mix, oil, water, and eggs.
- Adjust the ingredients to create a denser batter suitable for brownies.
- Mix the batter and add in any extra ingredients for added flavor and texture.
- Bake the brownies according to the recommended baking time.
- Cool the brownies completely before serving for the best results.
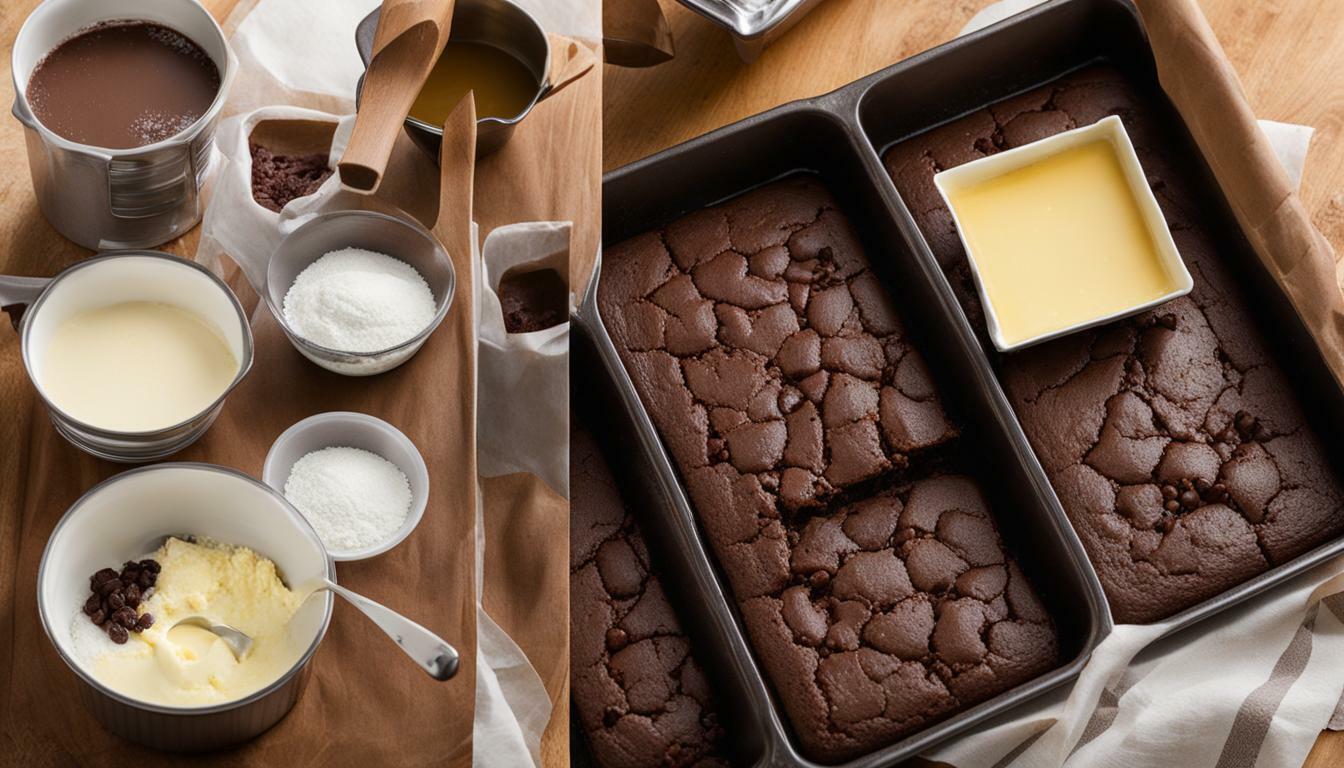
Gathering the Ingredients
Before you begin converting cake mix to brownies, gather the necessary ingredients to make cake mix brownies from scratch. You will need:
| Ingredients | Quantity |
|---|---|
| Cake mix | 1 box |
| Vegetable oil | 1/2 cup |
| Water | 1/4 cup |
| Eggs | 2 |
| Optional: chocolate chips or nuts | As desired |
Make sure you have all the ingredients on hand before proceeding with the recipe.
Preparing the Cake Mix
Now that you have gathered your ingredients, it’s time to prepare the cake mix for brownies. This is where the cake mix brownie hack comes in handy, making it an easy brownie recipe using cake mix.
Tip: For best results, choose a cake mix that closely matches the flavor of brownies you want. For instance, a chocolate cake mix would be ideal if you want chocolate brownies.
Begin by emptying the cake mix into a mixing bowl and mixing it with the oil, water, and eggs as directed on the box. However, instead of following the baking instructions, you will make a slight adjustment to the ingredient quantities to achieve a denser batter suitable for brownies.
Adjusting the Ingredients
To convert the cake mix to brownies, omit or reduce any additional ingredients called for by the cake mix instructions. This may include omitting eggs or reducing the quantity of oil and water, as required to create the perfect consistency for brownies.
Tip: For a more fudgy texture, use slightly less oil and water than the cake mix instructions call for. You can also omit the eggs entirely and use a can of soda instead. The carbon dioxide in the soda reacts with the cake mix to give you a light and fluffy texture that sets perfectly.
Once you have adjusted the ingredient quantities, mix the batter until all the ingredients are well combined to create your easy brownie recipe using cake mix.
Adjusting the Ingredients
To turn a cake mix into brownies, you need to adjust the ingredients. Depending on the specific cake mix you are using, the original instructions may call for additional ingredients that are not suitable for brownies. For example, many cake mixes call for extra eggs, which make the final product light and fluffy. However, brownies need to be dense and fudgy, so we will be omitting or reducing some of these ingredients.
If you are looking for a cake mix brownie recipe without eggs, this is the perfect solution. Simply reduce the amount of water and oil in the original instructions by about a third. This will help to create a thicker, denser batter that is perfect for brownies. If you prefer to keep the eggs in the recipe, use just one or two instead of the recommended three or four, depending on the quantity of cake mix you are using.
There are many ways to experiment and create cake mix brownie variations. For example, you can use a chocolate cake mix for a double chocolate flavor, or add in some cinnamon and nutmeg for a spicy twist. You can even swirl in some peanut butter or caramel for an indulgent treat. Get creative and see what works best for you!
Mixing the Batter
Now that you have adjusted the cake mix to create brownie batter, it’s time to mix everything together. Use a whisk or an electric mixer to combine all the ingredients until the batter is smooth and free of lumps.
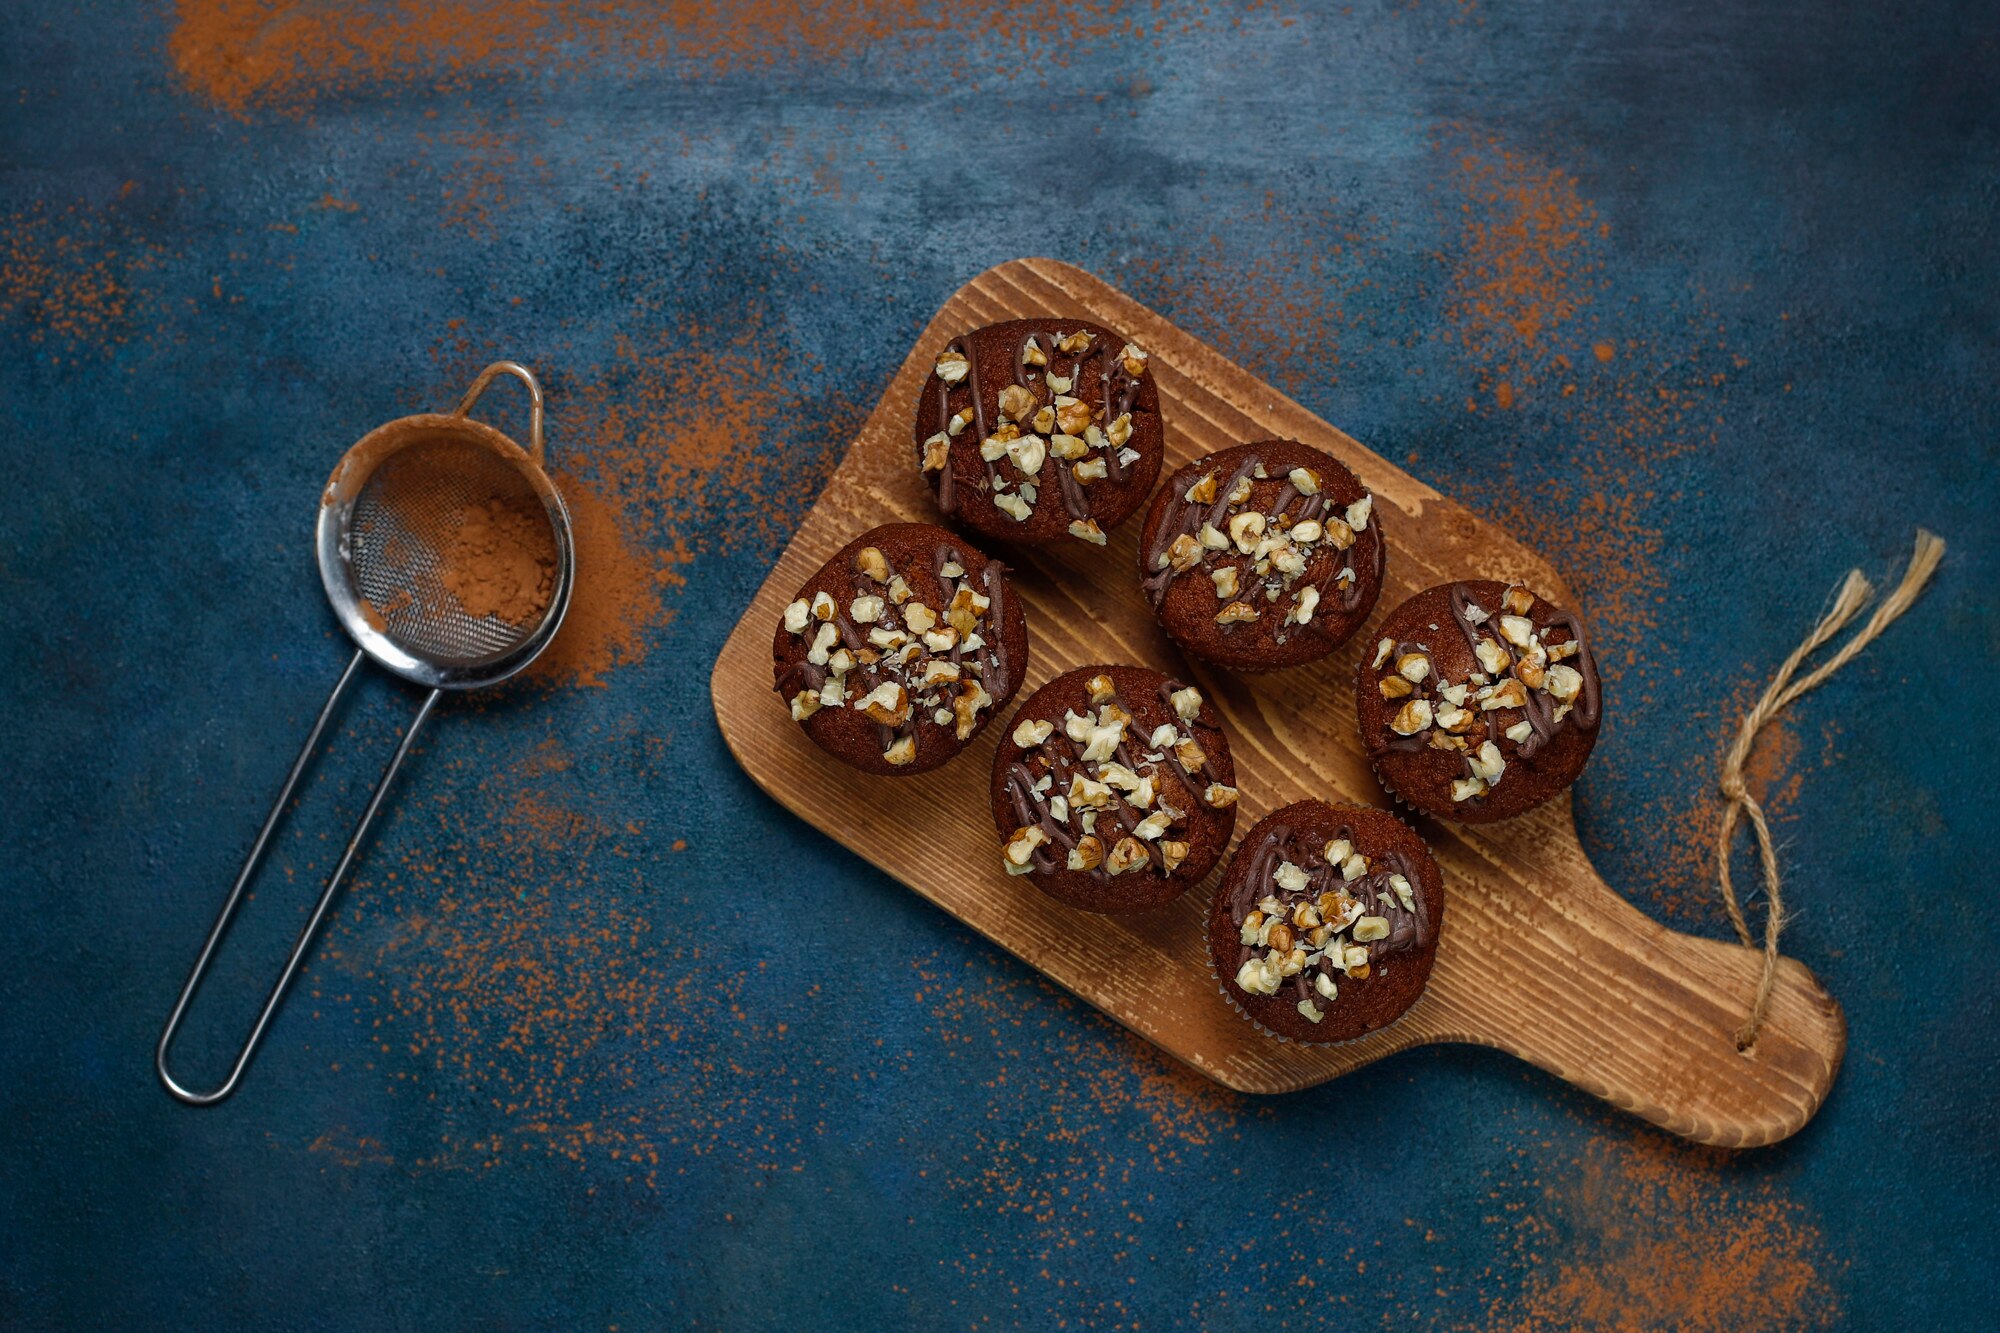
If you’re feeling creative, this is the perfect time to add in some mix-ins to elevate the flavor and texture of your brownies. Try stirring in some chocolate chips, chopped nuts, or even swirl in some caramel or peanut butter for an extra indulgent treat.
Tip: For an even more decadent twist, add a layer of cookie dough or cheesecake batter in between the brownie batter in the pan before baking.
Baking the Brownies
Now that you have mixed the batter, it’s time to bake the cake mix brownies. Preheat your oven to the temperature specified on the box of cake mix.
Grease a baking pan or line it with parchment paper. Pour the brownie batter into the prepared pan, spreading it evenly to ensure the brownies cook evenly.
Bake the brownies according to the recommended baking time for the cake mix you are using. This can range from 20-30 minutes, depending on the brand of cake mix and the size of the pan used.
Testing for Doneness
To determine if the brownies are ready, insert a toothpick into the center. If it comes out with a few moist crumbs, the brownies are done. If it comes out clean, they may be slightly over-baked, resulting in a drier texture.
It is essential to avoid over-baking the brownies; otherwise, they can become dry and crumbly. If the toothpick test reveals that the brownies are not yet done, return them to the oven and check them again in a few minutes until they are fully cooked.
Cooling and Serving
Once the cake mix brownies are fully baked, remove them from the oven and let them cool in the pan on a wire rack. Letting the brownies cool down helps them hold their shape.
Cut the brownies into squares or rectangles once they are cooled entirely. You can serve the homemade cake mix brownies on a platter or in individual servings for a delightful treat that everyone will love.
Testing for Doneness
Once the baking time is up, it’s time to check if your cake mix brownies are done. Here’s how:
- Insert a toothpick into the center of the brownies.
- If it comes out with a few moist crumbs, the brownies are done.
- If it comes out clean, they may be slightly over-baked, resulting in a drier texture.
It’s important not to over-bake the brownies, as this can make them dry and crumbly. If your toothpick comes out clean, it’s better to take the brownies out of the oven earlier next time. Keep in mind that the baking time may vary depending on your oven and the size of the baking pan you are using.
Cooling and Serving
Once the brownies are done baking, remove them from the oven and let them cool for at least 10 minutes in the pan. This will allow them to set and hold their shape better.
After the brownies have cooled down a bit, take them out of the pan and let them cool on a wire rack until they reach room temperature. This will take around 30 minutes.
Once cooled, cut the brownies into squares or rectangles using a sharp knife. For a more aesthetic look, clean the knife between each cut. Arrange them on a platter or in individual servings.
You can top your cake mix brownies with your favorite toppings. Some popular options include powdered sugar, chocolate chips, whipped cream, or drizzled chocolate. Get creative and mix it up for an even more delicious treat!
Conclusion
Converting a cake mix into brownies is a simple and easy process that anyone can do at home with just a few ingredients and step-by-step instructions. With a little creativity, you can customize your homemade brownies by adding your favorite mix-ins or toppings to make them even more delicious.
These cake mix brownies are perfect for any occasion and are sure to satisfy your chocolate cravings. Whether you’re hosting a party, celebrating a special occasion, or just looking for a tasty snack, these fudgy and rich brownies are a crowd-pleaser.
Takeaways
- Transforming a cake mix into brownies is an easy and straightforward process.
- Omit or reduce any additional ingredients called for by the cake mix instructions to create a denser batter suitable for brownies.
- Mix in any desired mix-ins or toppings for added texture and flavor.
- Cool the brownies completely in the pan before cutting them to help them hold their shape.
- Enjoy the rich and fudgy texture of homemade cake mix brownies that are sure to satisfy your chocolate cravings.
So go ahead and try making your own cake mix brownies today and impress your friends and family with your homemade baking skills!
FAQ
How do I turn a cake mix into brownies?
Follow our step-by-step guide to transform a regular cake mix into delicious brownies. It’s easy and simple!
What ingredients do I need to make cake mix brownies?
You will need a box of cake mix, vegetable oil, water, and eggs. You can also add chocolate chips or nuts for added flavor and texture.
How do I prepare the cake mix?
Just follow the instructions on the cake mix box for preparing the batter. We will make a slight modification to create brownies.
Do I need to adjust the ingredients?
Yes, to turn the cake mix into brownies, you may need to omit or reduce additional ingredients called for by the cake mix instructions. This will create a denser batter suitable for brownies.
How do I mix the batter?
Simply mix the adjusted cake batter until all the ingredients are well combined. You can also stir in chocolate chips or nuts at this stage, if desired.
How do I bake the brownies?
Preheat your oven to the temperature specified on the cake mix box. Grease a baking pan or line it with parchment paper. Pour the brownie batter into the pan, spreading it evenly. Bake according to the recommended baking time for your cake mix.
How do I test for doneness?
Insert a toothpick into the center of the brownies. If it comes out with a few moist crumbs, they are done. If it comes out clean, they may be slightly over-baked.
How do I cool and serve the brownies?
Allow the brownies to cool completely in the pan before cutting them into squares or rectangles. This will help them hold their shape. Serve and enjoy!